Monday, January 26, 2009

Kitchen Tip: Butchering Chicken

The benefit to buying whole chickens is that every part is useful. Once you remove the meat, the bones can be used to make Chicken Stock and you can save the gizzards and organs for enriching sauces and gravies.
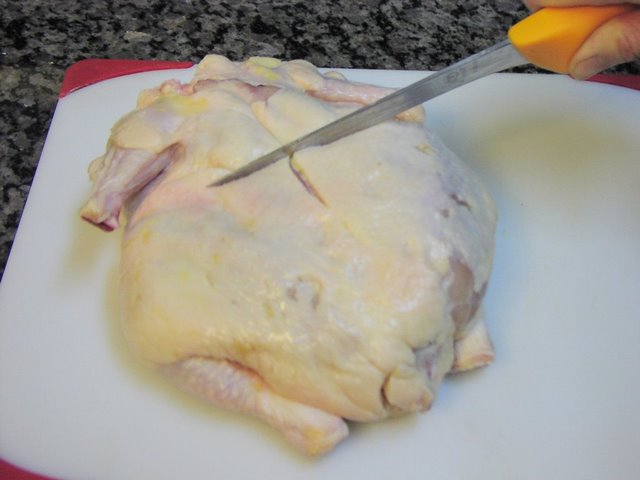
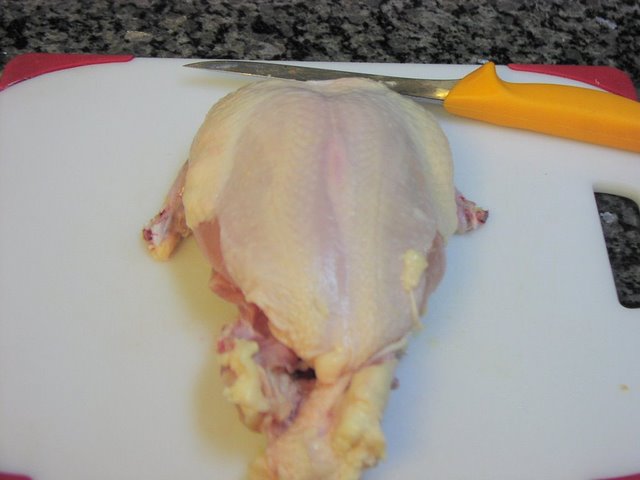
First, remove the wishbone:
Scrape at the shoulder to expose the wishbone.
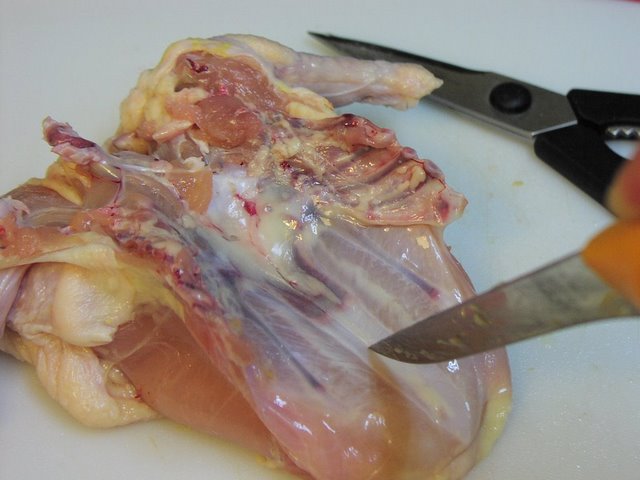
Once exposed, cut through the cartilage to loosen the prongs.
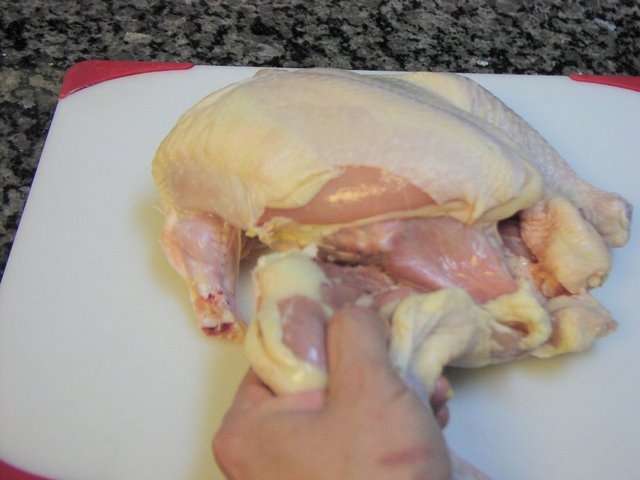
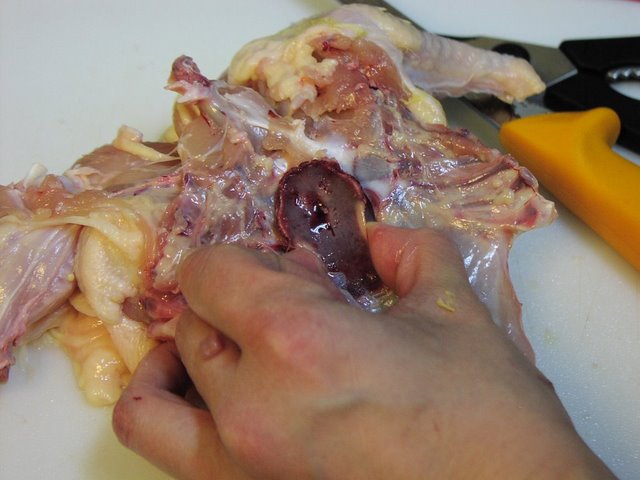
Use your fingers to loosen the wishbone from the breast meat. Feel your way to the top where it connects to the breastbone, then grab the top of the wishbone and give it a twist, then pull so it detaches. Removing the wishbone makes it easier to remove the breast meat later.
Next, if you wish, remove the wings by cutting through the first joint:
To remove the legs:
Mark the back by making a vertical cut down the center and a horizontal cut in line with the chicken's "elbows"
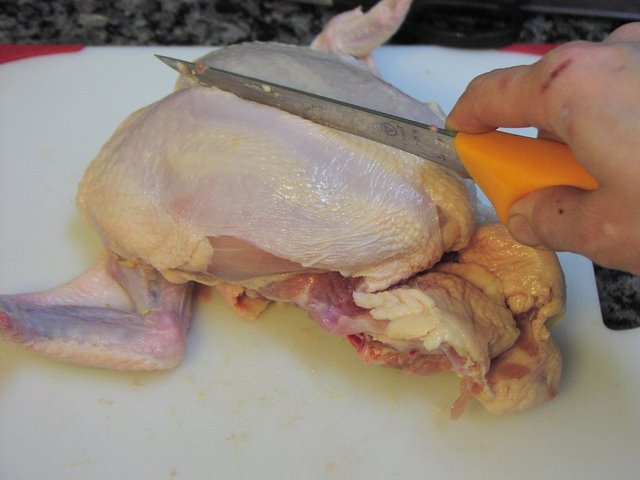
Make a cut between the breast and the leg, trying to preserve as much of the skin on the breast as possible.
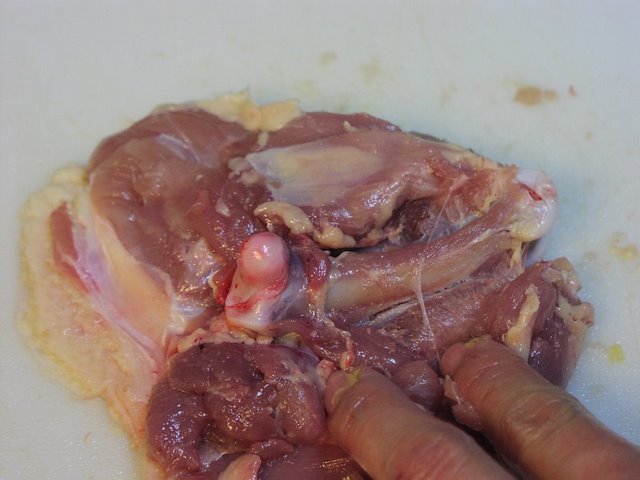
Make another horizontal cut connecting from the top of the thigh to the "X" you made in the back.  Then carefully use the tip of your knife and release the part of the thigh known as the "oyster" that sits in the hollow of the back.
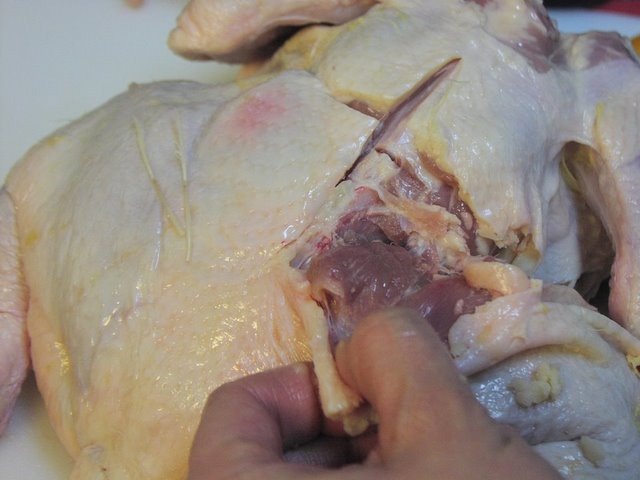
Pull the leg back to dislocate the joint at the hip. Cut through the cartilage to release the thighbone. Once the thighbone is released, you should be able to just tear the leg off the body.
Repeat with the other leg.
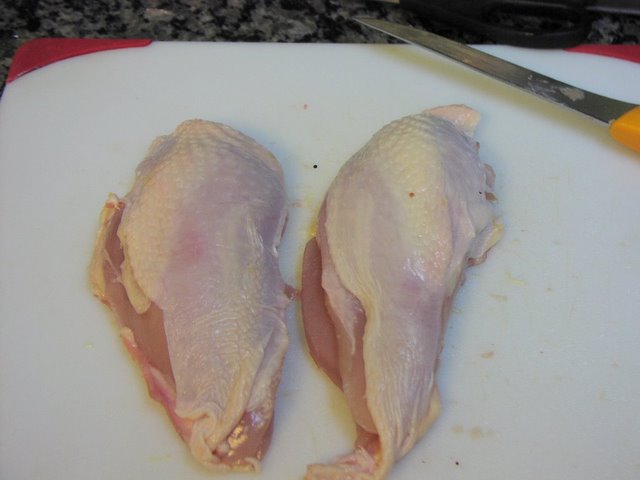
To leave the breasts on the bone:
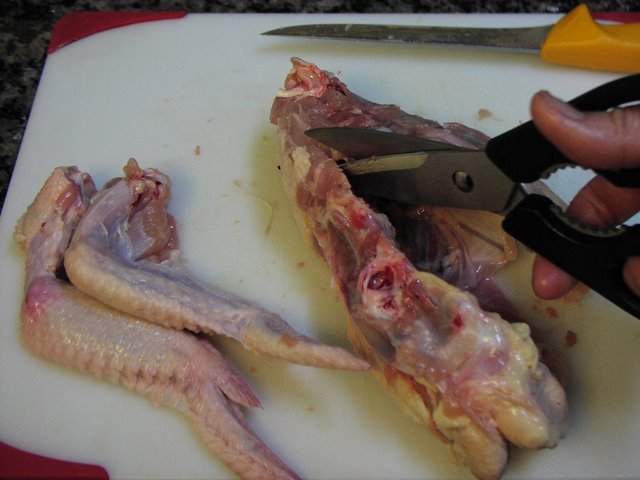
If you want to leave the breast whole, and on the bone, you can simply remove the back by cutting through the ribs with a pair of kitchen shears.
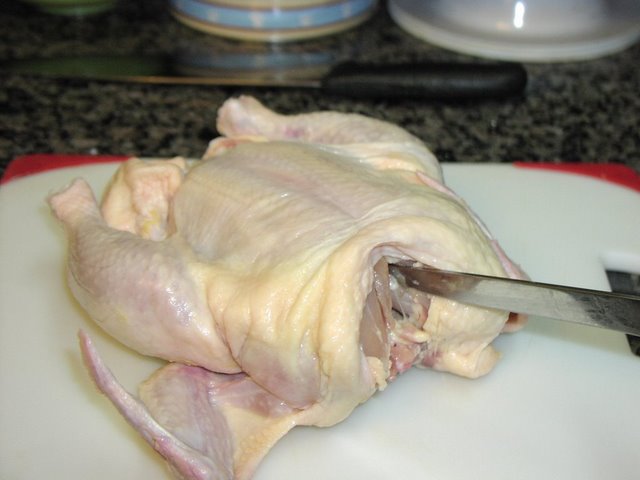
Then turn the breast over, and from the inside make a slight cut through the film of cartilage that encloses the breastbone.
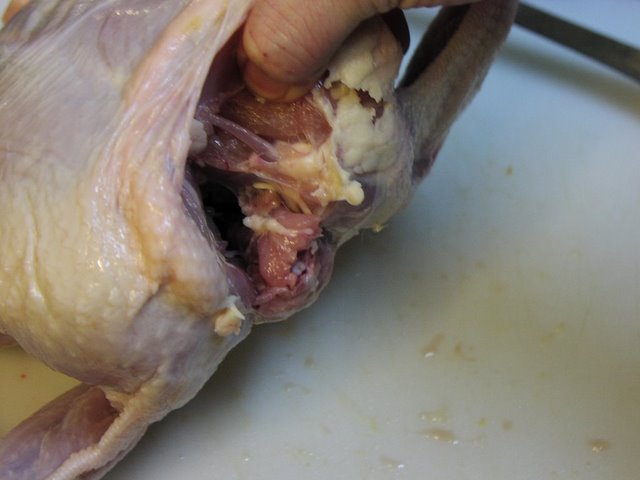
Scrape away the cartilage to expose the breastbone then grab it with your fingers and pull it out gently while using your other hand to hold the breast down on the counter.
Work your way down releasing the breastbone and hard cartilage from the breast meat. You may leave the breast whole, or simply cut down the center to separate the two breasts.
For boneless chicken breasts:
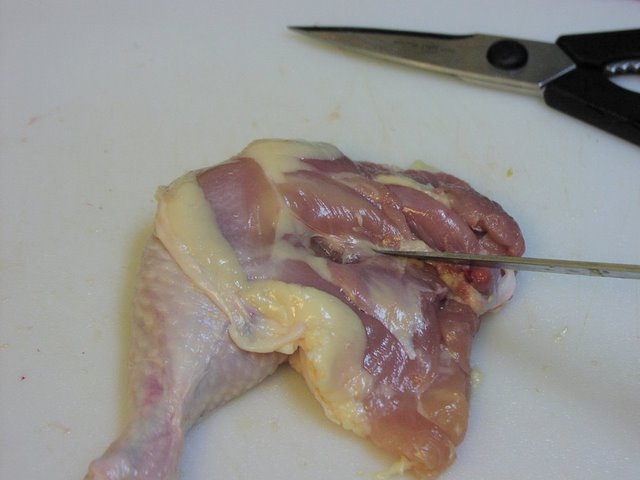
If you want to remove the breast fillets it is easier to do with the torso of the chicken intact, without removing the back. Simply estimate where the center of the breast is and make an incision straight down the center.
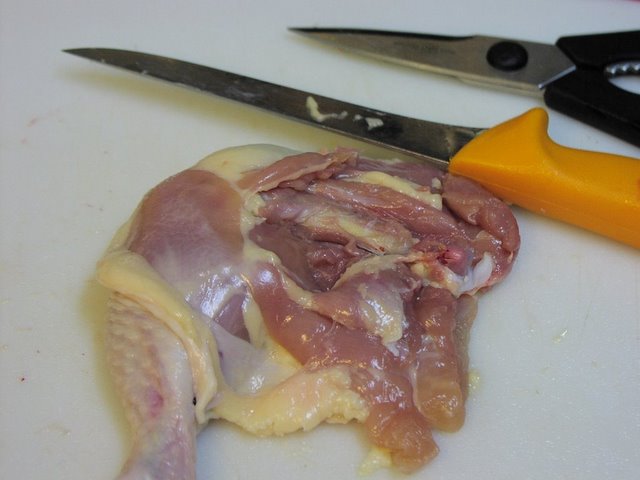
You should end up on one side of the breastbone. Remove the breast fillet by gently pulling the meat away from the bone and using your knife to separate it. Keeping your knife in contact with the bone as you cut will help prevent cutting through the breast and leaving too much meat on the bone.
Repeat on the other side.
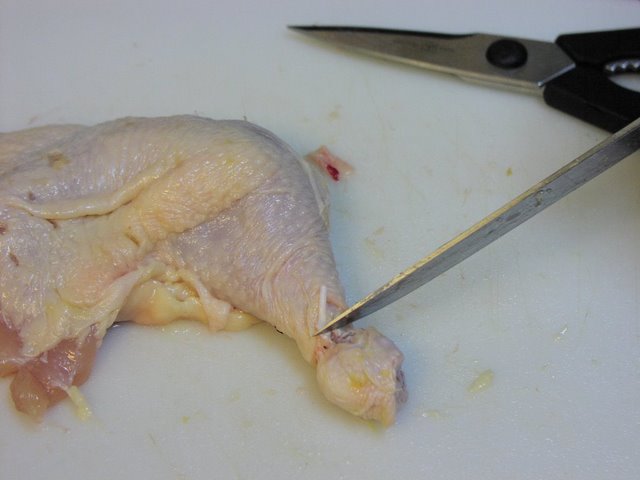
To cook the legs whole:
If you want to cook the legs whole, exposing the thighbone will help them to cook faster and more evenly.
There is line of fat that marks the exact place to cut.
"Marking" the leg, by cutting through the skin and ligaments at the ankle will release the meat to contract upward when cooked, making it easier to remove.
For separate thighs and drumsticks:
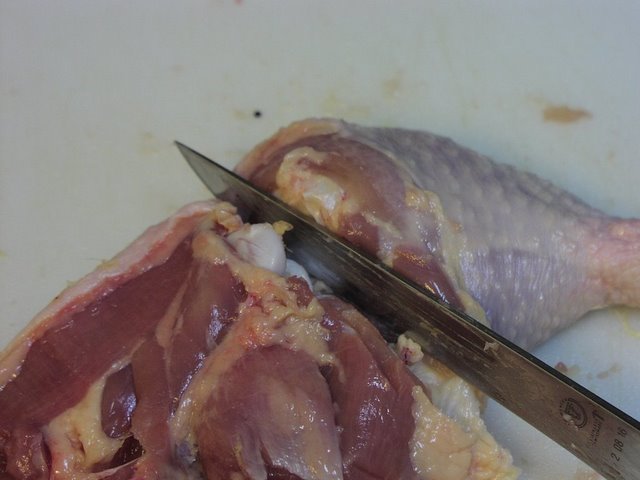
There is a line of fat that marks the joint between the thigh and the drumstick as well. To separate them, simply cut through this line to expose the joint.
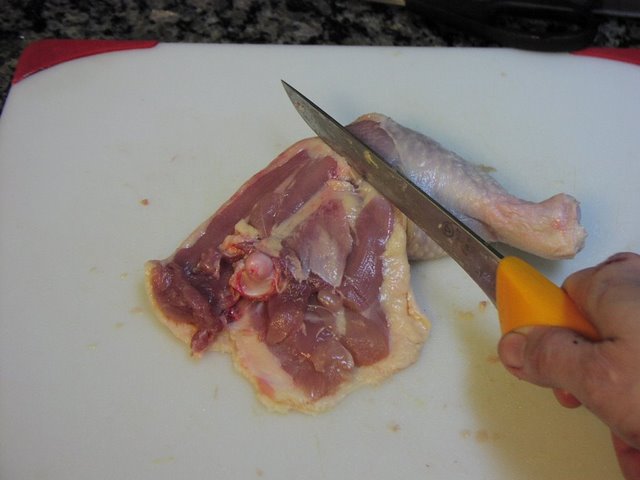
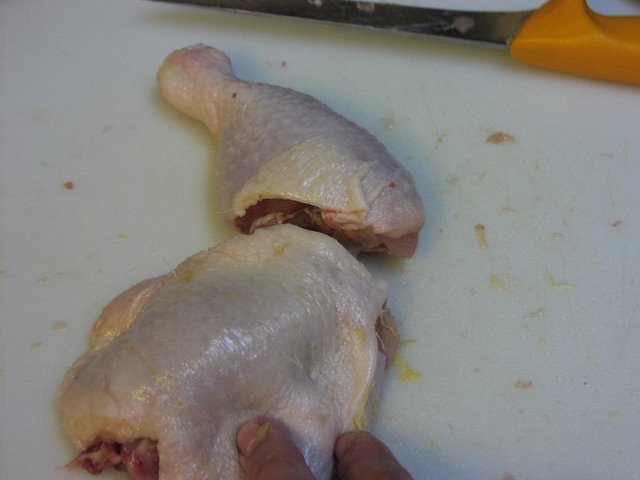
Then cut through the joint.
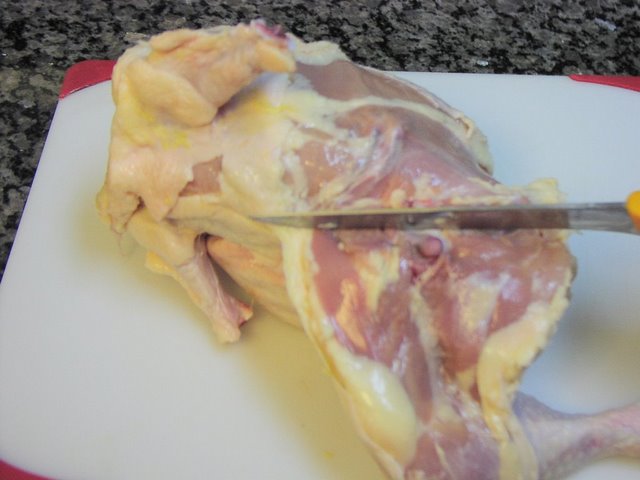
For boneless thighs, expose the thighbone but cutting along the line of fat that marks it's location.
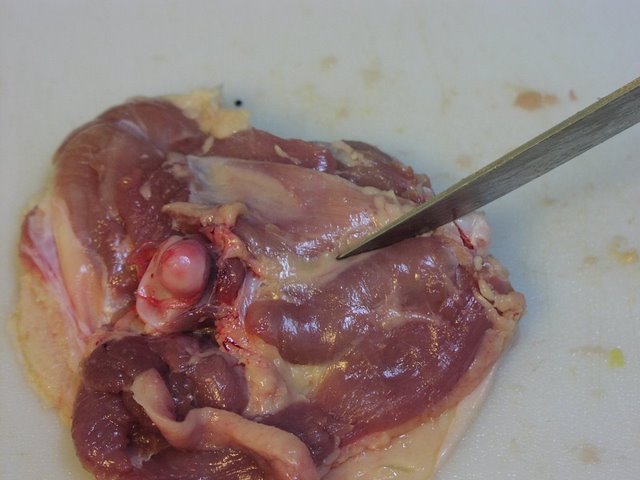
Then using the tip of the knife, cut under the bone and release it from the meat.
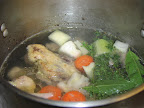
Save your bones!
Use the carcass, wings, and other bones for stock. You may want to cut the carcass into smaller pieces. If you are not using them right away, put them in a freezer bag and throw them in the freezer for up to 3 months.


Related Pages:

Thursday, January 15, 2009

Kitchen Tip: Tea Ball Bouquet Garni

I am always making bouquets garnis (that's French for sachet of herbs and spices) for stocks, soups, and sauces. If I know I'll be straining the end product, like a stock, I will usually just throw everything in the pot. If it's just herbs, I just tie them together with twine. But sometimes I don't want everything floating in there willy nilly, like in the case of sauces or stews. Instead of cheesecloth or leek greens, I use fine meshed tea ball. The small 1-1/2" diameter ones are fine for smaller recipes, but I also keep a larger 3" diameter one for stockpot recipes. I just pack my herbs, peppercorns, etc, in there and hang it on the rim of the pot so I can easily fish it out later. It works great and is reusable too. So save your cheesecloth for cheesemaking.

Classic Bouquet Garni:

small bunch of fresh thyme

2-3 bay leaves

1 Tbsp. whole black peppercorns


Wednesday, January 14, 2009

Kitchen Tip: Peeling Fresh Tomatoes

To peel fresh tomatoes for use in sauces, soups etc.

  1. Bring a large pot of water to a boil.
  2. Fill another large pot or bowl with ice water.
  3. Cut out the stem, and cut an "X" in the bottom of each tomato.
  4. Place the tomatoes in the boiling water for a few seconds, then plunge them into the ice water.
  5. Remove the tomatoes from the water. Using a paring knife, peel the skins. It is usually easier to start from the "X" on the bottom of each tomato. If the skins do not peel easiliy, repeat step 4.
  6. Seed and cut each tomato as needed for your recipe.
Try this technique with these recipes:
Sausage and Pepper Ragout

Oh, for the Love of Pig!

So we have a new sous chef at work. He saw a video on You Tube of Chris Consentino making Porchetta di Testa, and wanted to try it at the restaurant. What is porchetta di testa? Well it is basically a pig's head that is boned out, marinated, then rolled up, tied, and wrapped, then slow braised for 14 hours. How psyched was I when my sous chef ordered two heads and offered to let me make one?!

DAY 1 - Deboning the head, face to face
pig01
I arrived at work early for Day 1 of Project Porchetta. My sous chef demonstrated on one pig's head while I looked on and snapped some photos. As he turned the head upside down to get at its chin, some blood spilled out of the snout. There was no avoiding the reality of the animal. Here I was, staring at its bloody nose, and tongue hanging out the side of its mouth. The heads that we received from our meat purveyor had some of the flesh around the eyes already cut away, but the eyes were still there. Some say they can't eat an animal that is staring at them (like whole fish, head on), but really, there was no life left in the eyes of this pig. It wasn't staring at anything. I was transfixed, and my sous chef admitted to being a little surprised at how un-squeamish I was about the process. He cut his way from the chin to the snout on the underside of the head, exposing the jowls and teeth, then turned the head around and released the skin and flesh from the crown down the top of the snout. In about 15-20 minutes, the skull was separated from the face, and the tongue from the skull. Until then, I had no idea what a pig's skull looked like. What came off of it, aside from the fleshy underside of course, looked just like a halloween pig mask. Dares to wear it ensued among the prep crew.
pig09
Then it was my turn. The first thing I noticed was the weight of the pig's head. It was easily 20 pounds (by feel, it seemed heavier than my cat, but lighter than my dog). Using a disposable gillette razor, I shaved remnants of bristle from its brow, cheek, and chin and cleaned debris and wax out of the ears. A brief once-over with a torch removed any stubble left behind by the razor. Then, as my sous chef had done, I turned the head over (another bloody nose) and started cutting at the chin. Pulling at the flesh, I used the tip of my knife to slowly separate it from the jawbone. My goal was to leave the skull as clean as possible, leaving most of the meat attached to the skin. I was thankful to have the other pig's skull next to me so I could see what I was looking for underneath everything. My sous chef left me to my work, remarking to the prep cooks that I was "mucha macho," as our house butcher looked on approvingly. I guess they weren't used to seeing a woman so enthusiastic about butchering hog. Anyway, there were several different muscles and a lot of connective tissue under the jaw, making it extra tricky to figure out where to cut. Cutting away the top of the head was a little easier. There wasn't a lot of flesh there except for the cheeks, so I had to take it slow not to cut through the skin. The last step of taking the mask off the snout was definitely a two-person job. I tried to do it myself, but the pig mask was cumbersome - just flapping around - and there was no way to rest the skull steadily. One person needed to pull on the skull while the other pulled on the mask and cut away at the cartilage of the snout. After separating the mask from the skull, I pulled open the jawbone to get at the tongue, then pulled the tongue down through the jaw and separated it from the skull a its base.
We generously seasoned both masks inside and out, and the tongues with salt, pepper, and herbs and wrapped them tightly in plastic. Then they were placed in the refrigerator to cure/marinate. We marinated the first one for only one day, mine for two days.

DAY 3 - Tie and Braise
pig14
After two days of curing, I unwrapped my pig's head and removed all the herbs. Unlike what was shown in Chris Consentino's video, we had left the ears on on the pig face. So before rolling the mask, we tucked the tips of its ears into the eye holes. We put the tongue inside the snout, and rolled the whole thing up, tucking in the ends.
pig17
We tied up the package, wrapped it in several layers of plastic wrap, then in aluminum foil. Finally we tied up the wrapped package and braised it overnight for 14 hours in a large pot of water on an induction cooktop set at 180-190 degrees. We learned, from having braised the first pig head the night before, that even if I filled the pot to the brim at closing, by the time my sous chef arrived the next morning, so much of the water would have evaporated that the porchetta would be only half covered. So this time we had to make sure that the night crew that came in to clean would periodically check in and refill the pot if needed.

DAY 4 - Cool and Set
Although I was happy about having a day off from work, I was disappointed that I wouldn't be there to see this step through with the pig's head I had started. However I had seen the the porchetta that my sous chef braised the day before hanging in the walk-in. After braising, he removed the porchetta from the liquid, cooled it down, still wrapped to let the gelatin set back up. In my absence, he would also take care of this step for the second one.

DAY 6 - Slice and Serve
pig21
Ah, the day of reckoning. It has been almost a week since I started out face to face with the pig's head (more, if you count the time it took to defrost it). On day three, while we were rolling the porchetta that I had deboned, my sous chef remarked "this is your baby too." He had, inadvertently or not, stumbled onto a very fitting metaphor. In a way, it was my baby (wait, does that make him my Lamaze partner?) Here was this humble pig's head, a part of the animal most Americans don't ever want to associate with ham and cheese sandwiches or juicy pork chops. I lovingly and with much care, deboned it, seasoned it, and rolled it. I made sure that there was someone to babysit the entire 14 hours it braised, then I entrusted someone else to take it out, cool it and hang it. In many ways the past 6 days have been like a gestation period. I had no idea what to expect. Did I wrap it tightly enough? Would the fat and gelatin set? Would there be to many air pockets? I was giddy with anticipation, when today, we finally unwrapped that baby, sliced it and tasted it. Was it good? Hmm-hmm, come to mama...
pig22
AMAZON